
How to Install Laravel 9 on Windows 10 / 11
In this tutorial, I will show you how to install Laravel 9 on Windows 10 or 11.
Laravel is the most popular PHP framework which is very useful to build amazing web based applications.
So before start installation of Laravel 9 on Windows, first lets install all the software and applications which are required to install Laravel 9 on Windows.
Laravel is a PHP framework, therefore it is mandatory that you have already installed PHP on your machine.
Laravel 9 requires minimum PHP version of 8.0, therefore make sure that you are using PHP 8.0 otherwise it will not work.
You can install PHP on your system manually, but I prefer to use the XAMPP because it comes with PHP, MariaDB and Apache.
If you do not have installed PHP on your machine, you can install it through XAMPP. Follow this guide on how to install XAMPP on Windows 10/11.
Another thing that we need to install Laravel 9 on Windows is Composer.
Composer is the PHP dependency manager and it helps to install Laravel 9 in just few commands. Here is how to Install Composer on Windows 10/11.
So now when you installed both PHP and Composer, we are ready to install Laravel 9 on Windows.
How to Install Laravel on Windows
Open the command prompt and navigate to the directory where you want to install Laravel 9. I prefer to install Laravel 9 in my desktop/workspace directory.
I prefer this desktop/workspace directory because this is where you have full rights, if you try to install it in C:/XAMPP or any other directory then you might face user rights issues therefore I recommend Desktop and your desired directory name to avoid such conflicts.
You can use the below commands to change directory on command prompt.
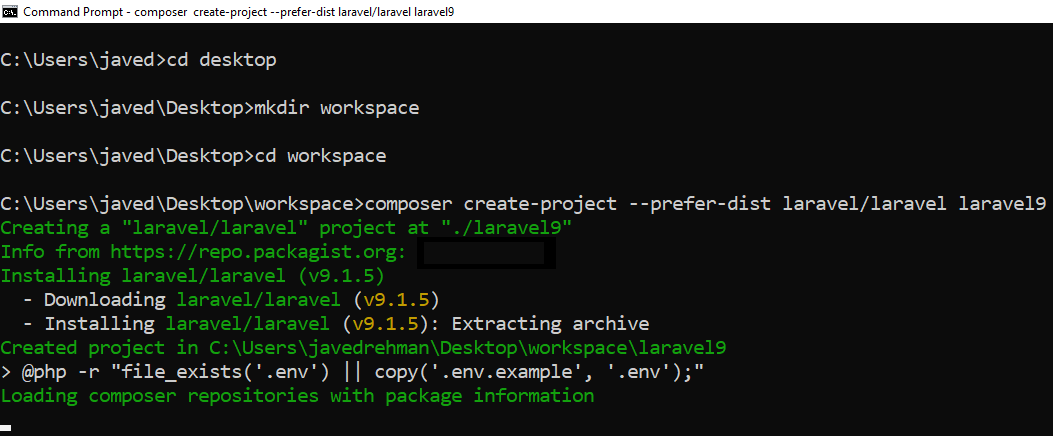
cd desktopUse the below command to create a new folder/directory on desktop.
mkdir workspaceNow go to the workspace directory by running the below command.
cd workspaceNow run the below command to install Laravel 9 in workspace directory.
composer create-project --prefer-dist laravel/laravel laravel9In the above command laravel9 is your project directory name, you can choose any name which you like.
Now wait for the installation process to complete, once the installation is completed, run the below command to change the directory to laravel9 directory and run the application on development server.
cd laravel9
php artisan serve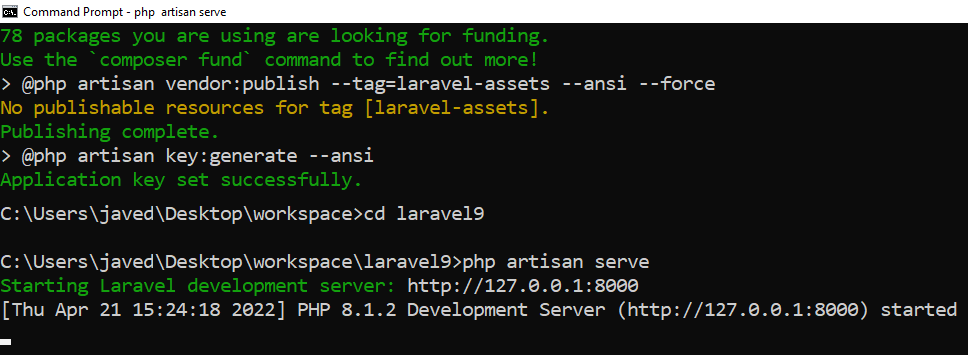
If you want to run the application on different port so you can use this command.
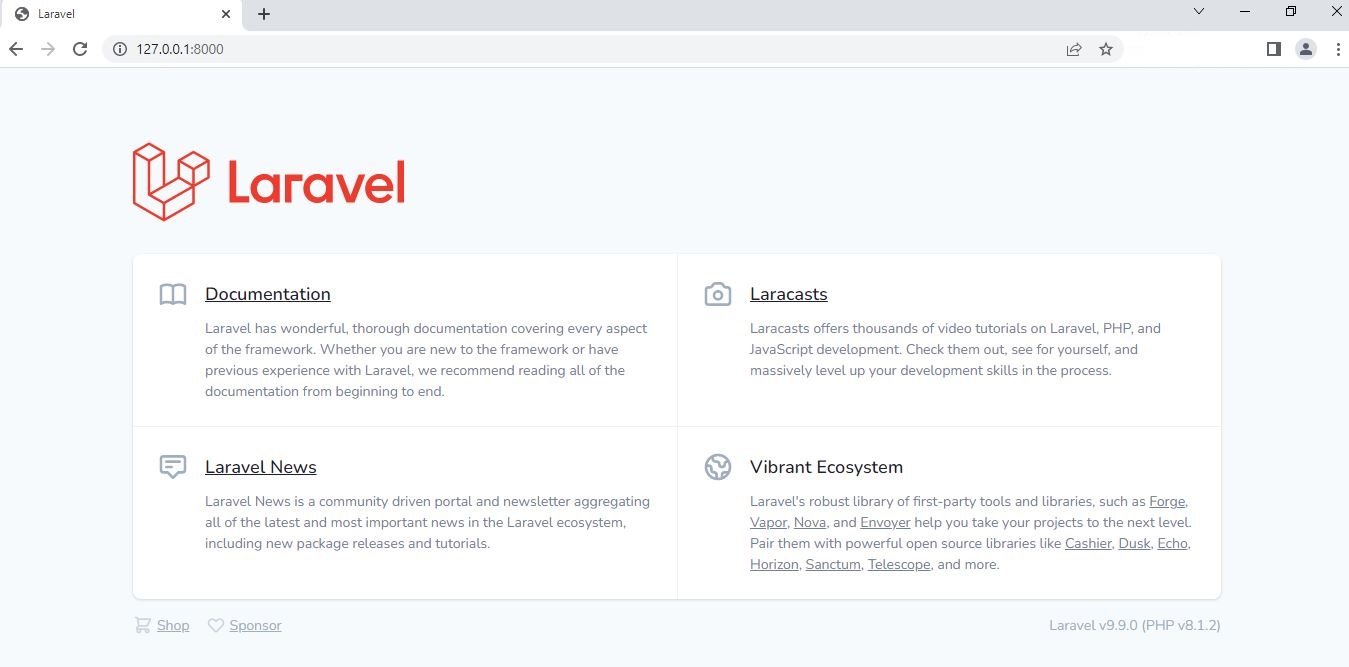
php artisan serve --port=8080Now you have successfully installed Laravel 9 on Windows, so copy the Development Server URL: http://127.0.0.1:8000/ and hit in the browser to see the application running.
Conclusion
In this tutorial, I have shown you how to install Laravel 9 on Windows 10 / 11 through Composer. Now you can start learning and development on Laravel 9.
Facebook Official Page: All PHP Tricks
Twitter Official Page: All PHP Tricks
When I tried to download this I got a git was not found in you PATH Skipping source download, does this matter if it does how do I fix it
Dear James,
Git is not required to install Laravel, it is an additional tool that is use for versioning. You need the following to install Laravel:
PHP, MySQL, Composer and Node.
Helpful Javed bhai…
Thanks Hasan.